


Guide to Creating a Facebook Fan Page
Using social networking to increase your base, and to widen your empire is one of the best pieces of advice I ever heard. Today, I have a self-published blog site, with over 15 million hits per year and more than 30,0000 thousand regular visitors.MY networks are ever-growing list of followers, and life just could not get any better. Today, I amcurrently putting together a course on UDEMY of how I did all of this with the financial records to prove it.
When it comes to publicising youself, nothing spells “publicity” better than social networking sites, such as Facebook, Twitter and Google Plus. Today, I wanted to show you a few hints and tips for creating a ‘Facebook Fan Page’ for your own blog or site.
 Facebook Fan Page Basics
The page system in Facebook is like a mini platform for you to showcase your talents, build a fan base, and to give back to your loyal readers/ fans.
Here’s how to create your own Facebook page:
- Log in to your Facebook account. Your new page will be linked to this account, and any changes you make to your account will need to be done after you log in.
- Go to the pages management area of Facebook and click the ‘Create Page’ button at the top of the page.
- The first step is to choose what type of page you will create. Choose “Brand, Product, or Organisation”, and choose the ‘Website’ profile in the drop down menu.
- Give your page a name, and agree to the Facebook pages terms after going through them.
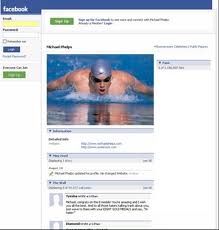
- Add a relevant profile image to your page. This is the image that your followers will see and associate with you and your site.
- Add basic information about your site for your fans to see, using the “info” tab in the page. Don’t forget to add your website URL here.
- At any point of time, you can edit the page using the “Edit Page” button always visible at the top of your page.
 As people start liking your page, it will become visible to their friends and so on. To invite your friends to view your page, click on the “Build an Audience” button at the top of your page’s admin panel, and select “Invite Friends.”
Final Steps
Once the Facebook side is completed, it is now time to advertise the page on your blog site as well. Add a Facebook widget linking your blog to its Facebook fan page..
FINALLY
Once you have the page set up you need to make sure you post to it regularly – it’s worth creating a rough strategy of what you will do and when you will do it. In an ideal world you would update you Facebook page once a day, but that can be challenging, especially when you are starting out. Below are some tips that might help.
- Update your Facebook page on a set schedule. Once a day is ideal, otherwise on set days during the week.
- Dont update more than once or twice a day
- Images and videos work best.
- Don’t just post about your website – post other useful/ interesting content related to your blog.
- Write all your posts on one day a week when you have some time and use Facebook’s integrated scheduling to spread them across the next of the week

These little tips I write about have helped me immensely I hope they help someone else.
Justin Matthew
We represent multiple major corporations and they are available for references. [email protected]
www.ownsocialmedia.com
www.monopolizesocialmedia.com
https://www.facebook.com/MonopolizeSocialMedia
https://plus.google.com/u/0/+JustinMatthewSocialMedia/posts
https://plus.google.com/u/0/+Monopolizesocialmedia/posts


